On a Quest to find Sanbot's deepest secrets – Part 5 (Getting buildroot to work)
With a working u-boot in part 4 of this series, what could we possibly add? More of our own code, of course. In this blog post I will describe how I got Buildroot working on this ancient 10-year-old tablet.
Legal note
This research was conducted on hardware legally owned by the author. All analysis is performed for the purposes of interoperability, repair, and educational research.
No proprietary firmware or copyrighted software is redistributed on this site.
Why Buildroot?
For those who don't know, Buildroot is a very easy way to hack together a small Linux distro. It consists mostly of a build system, a mainline (or custom) Linux kernel, and a few useful CLI tools. The build process is straightforward: generate the .config with make menuconfig and then run make. That's it.
So why not Yocto, Armbian, or <insert any other project here>?
Because Buildroot is simply easier to modify and rebuild for quick experiments. I only have to tweak the devicetree or adjust options in menuconfig to add or remove functionality.
The build also produces nice standalone artifacts like .dtb, zImage, and rootfs.tar, which I can easily copy to a USB drive and boot with my custom U-Boot build.
Yocto would require meta-layers and much more configuration. Armbian also involves a lot more setup. Android builds are huge, and I simply don't need the entire Android userspace for quick testing.
How I did it
It turns out that mainline Linux already has support for the Banana Pi M3:
arch/arm/boot/dts/allwinner/sun8i-a83t-bananapi-m3.dts
/ {
    model = "Banana Pi BPI-M3";
    compatible = "sinovoip,bpi-m3", "allwinner,sun8i-a83t";
    ...
}
Since the Sanbot tablet also uses the Allwinner A83T, this is a good starting point.
So let's clone Buildroot and open the configuration menu:
git clone https://github.com/buildroot/buildroot.git
cd buildroot && make menuconfig
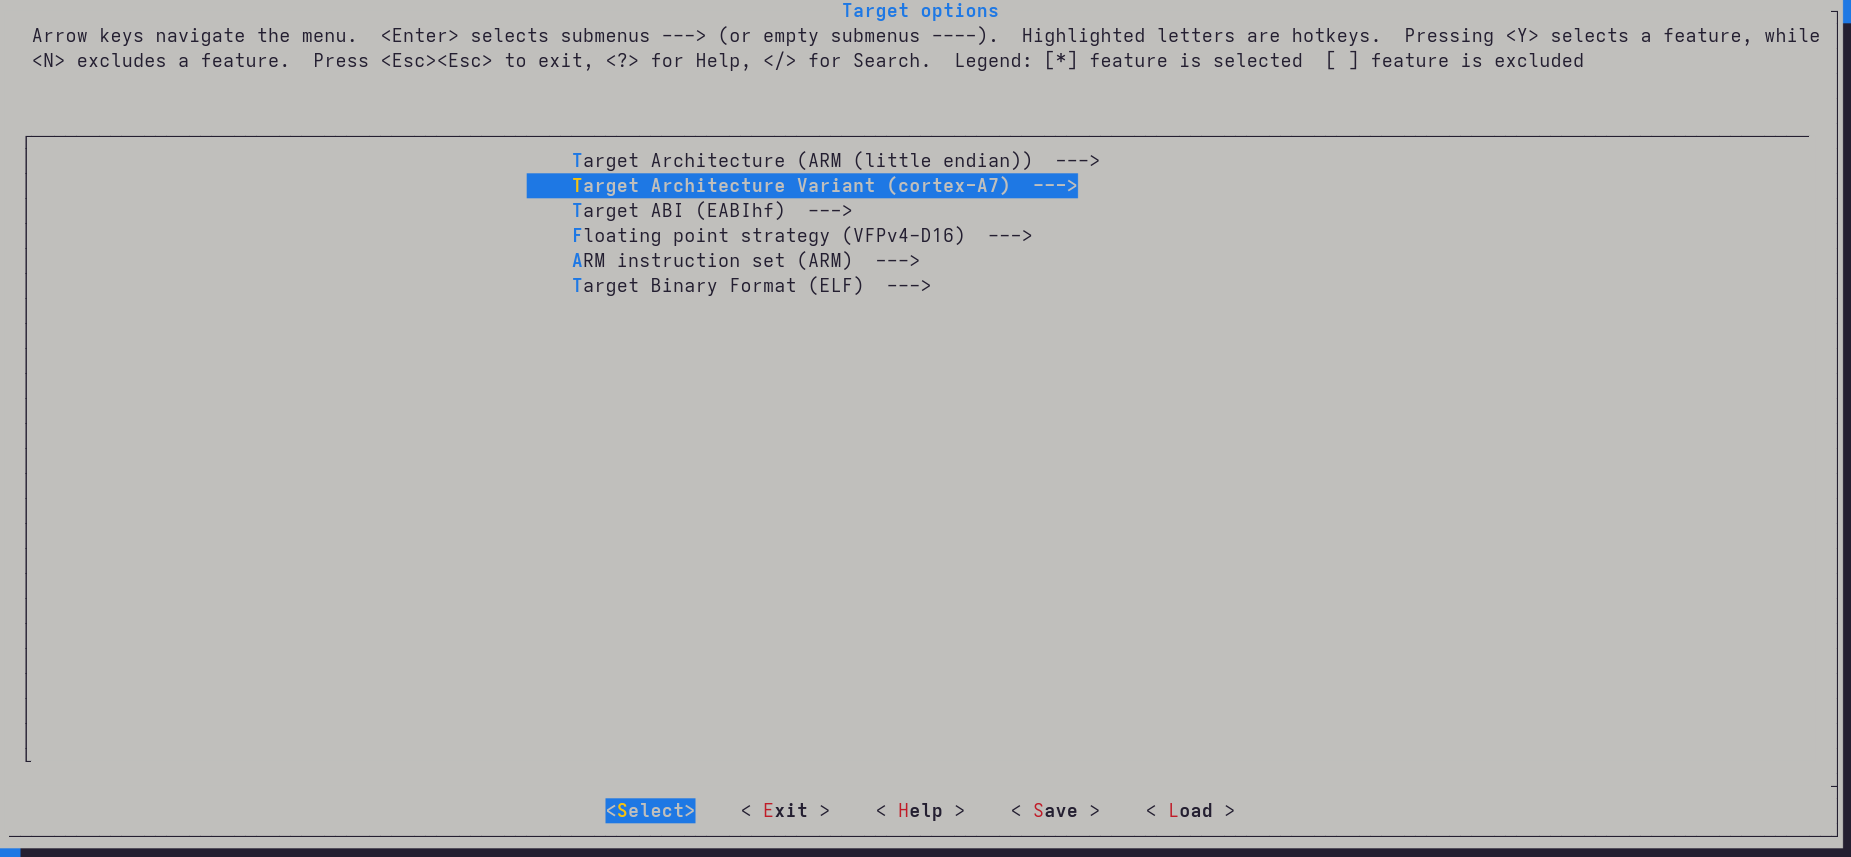
First configure the Target options.
Change the following:
- Target Architecture → ARM (little endian)
- Target Architecture Variant → cortex-A7
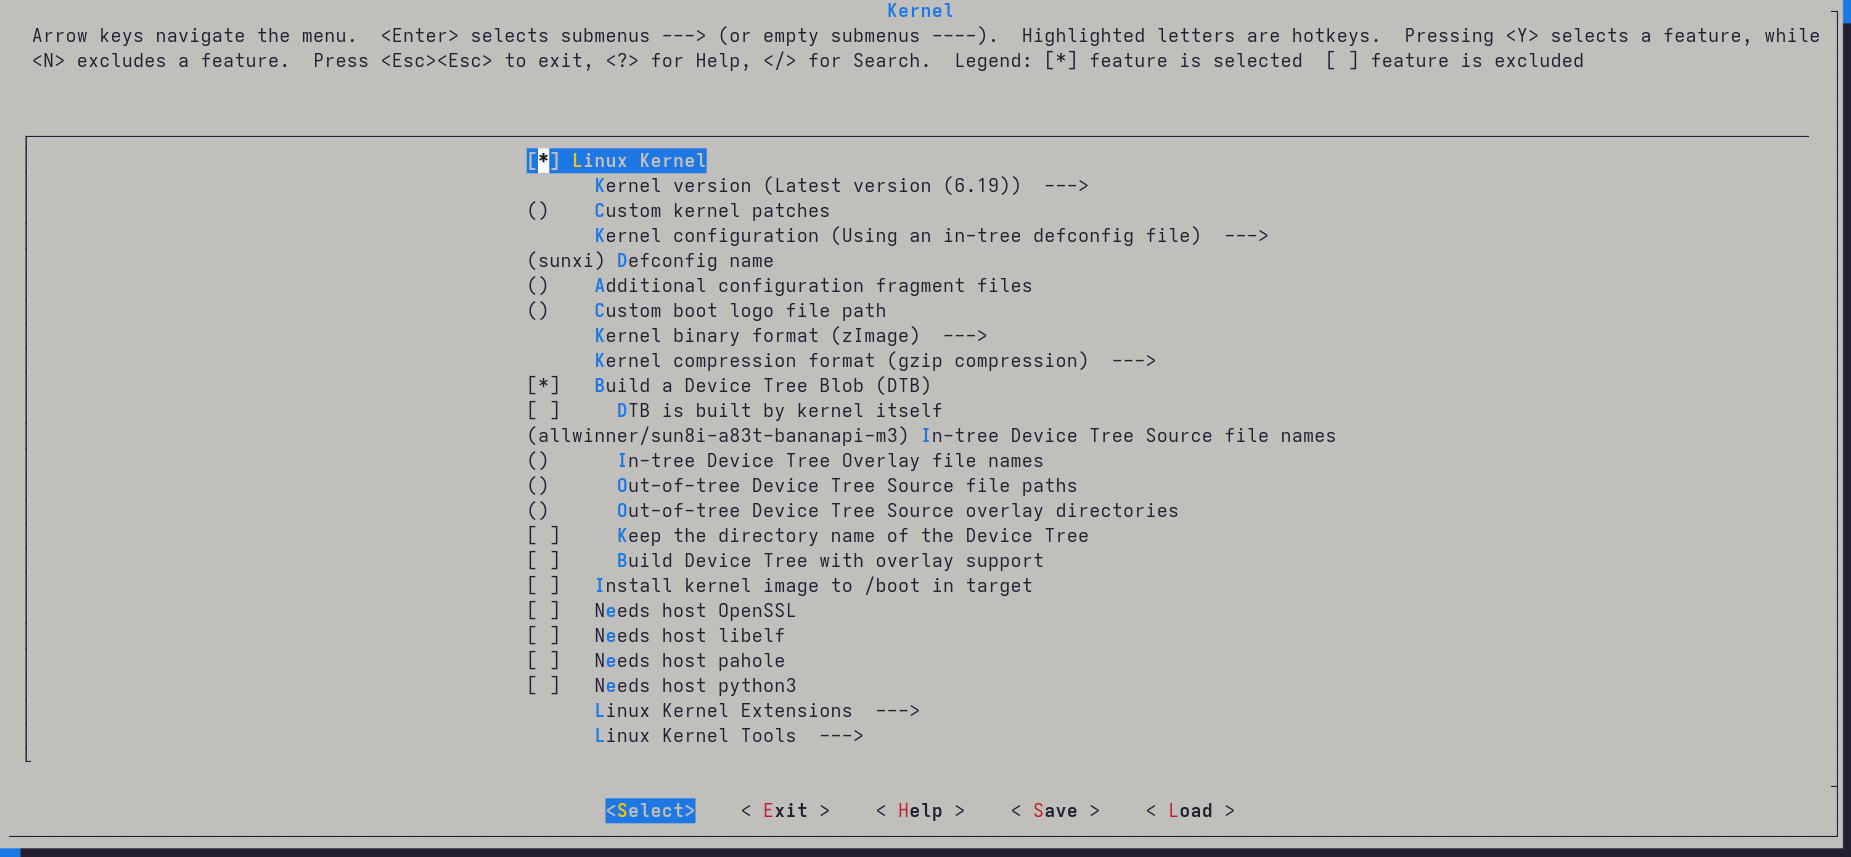
Next go to Kernel and enable the Linux kernel with the following settings:
- Defconfig name →
sunxi -
Build a Device Tree Blob
-
In-tree Device Tree Source file names:
allwinner/sun8i-a83t-bananapi-m3
After this, grab some coffee — the compilation takes around 10–15 minutes.
Preparing the USB disk
Once the build finishes, prepare a USB drive:
sudo mkfs.ext4 /dev/<replace_with_usb_part>
<mount the USB using file manager and copy the usb-drive path>
cp -r output/images/zImage <usb_drive_path>
cp -r output/images/sun8i-a83t-bananapi-m3.dtb <usb_drive_path>
sudo tar xf output/images/rootfs.tar -C <usb_drive_path>
Booting it
Next I tried to boot it using my custom U-Boot:
sunxi-fel uboot u-boot-sunxi-with-spl.bin
<press any key in uart-console>

usb start
ext4load usb 0:1 0x42000000 /zImage
ext4load usb 0:1 0x43000000 /sun8i-a83t-bananapi-m3.dtb
setenv bootargs console=ttyS0,115200 earlycon root=/dev/sda1 rw rootwait
bootz 0x42000000 - 0x43000000
And it almost booted immediately:
=> ext4load usb 0:1 0x42000000 /zImage
5775616 bytes read in 144 ms (38.2 MiB/s)
=> ext4load usb 0:1 0x43000000 /sun8i-a83t-bananapi-m3.dtb
25459 bytes read in 5 ms (4.9 MiB/s)
=> setenv bootargs console=ttyS0,115200 earlycon root=/dev/sda1 rw rootwait loglevel=8
=> bootz 0x42000000 - 0x43000000
Kernel image @ 0x42000000 [ 0x000000 - 0x582100 ]
...
Starting kernel ...
Boot logs started scrolling by, but something strange happened:
usb 1-1.4.2: USB disconnect
usb 1-1.4.2: new high-speed USB device
usb 1-1.4.2: USB disconnect
usb 1-1.4.2: new high-speed USB device
...
Why does my USB device keep connecting and disconnecting?
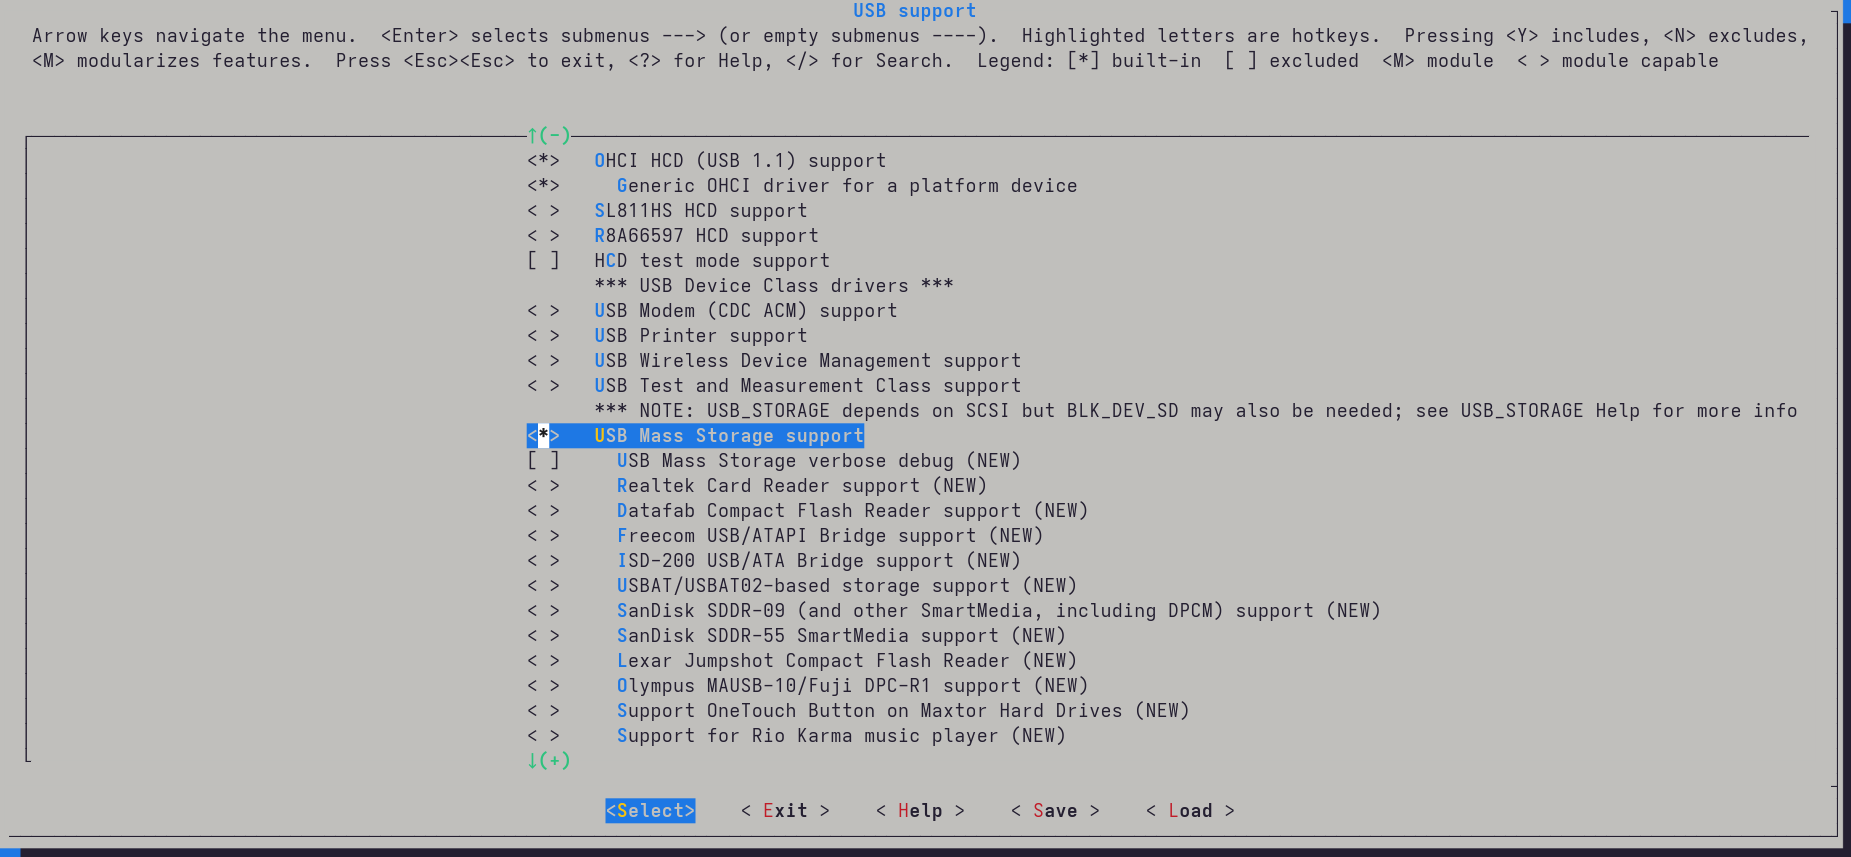
After digging through menuconfig, the answer appeared quickly: USB mass storage support wasn't enabled.
Fixing that was easy.
Run:
make linux-menuconfig
Navigate to:
Device Drivers
 → USB Support
   → USB Mass Storage support
Press space twice so the option becomes * instead of M.
Rebuild the kernel and try again.
And this time:
Starting syslogd: OK
Starting klogd: OK
Running sysctl: OK
Starting network: OK
Starting crond: OK

Welcome to Buildroot
buildroot login:
It works!
What's working?
From the limited testing I've done so far:
- CPU and scheduler work fine
- HDMI hotplug detection works
- DRM video output works
This matches the status shown in the mainline effort table pretty well.
The GPU will probably never work on mainline, unfortunately. The SoC uses an Imagination PowerVR SGX544MP1, which only has an old proprietary DDK targeting kernel 3.4:
Newer kernels aren't supported at all, and it doesn't look like there is any intention to mainline it.
In the end, for our custom Ubuntu Touch build we will probably have to run an older kernel. Ideally I would like to port the driver to at least kernel 4.x, so we can benefit from some of the newer security and stability improvements.
For now though, the next goal is simpler: getting the display working.
According to the mainline effort table, the RGB display interface is supported, so it should be possible to extract the parameters from the Android ROM and use them to construct a working device tree for the panel.